Hey everyone! If you’ve ever walked into a home studio, a trendy co-working space, or even a busy café and noticed how much better the sound feels—less echo, fewer loud reflections, way more balanced—chances are acoustic panels on the ceiling are playing a huge part. I’ve been in the acoustic panel game for years now, and one of the most common questions I get from folks is, “Wait, how do you actually put those up? It looks way simpler than it is, right?” Acoustic Panel
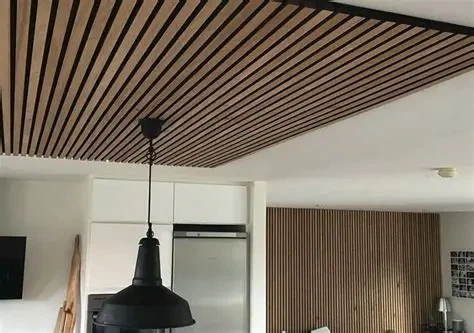
Nah, it’s not rocket science, but skip a few key steps and you’ll end up with panels that look janky or, even worse, don’t fix the sound issues you’re dealing with. As someone who helps businesses and homeowners pick the right panels, I’ve walked so many people through this process that I can tell you: getting it right is all about prep, not just hammering things up. Let’s break this down like we’re chatting over coffee, no fancy jargon or stuffy guides here.
First off, let’s talk about when you even need ceiling acoustic panels. If your room feels like a echo chamber when someone talks, or music has that muddy, indistinct quality where every instrument blends together, ceiling panels are way more effective than just wall ones. Sound bounces off every hard surface—drywall, tile, concrete—so the ceiling is one of the biggest culprits for that harsh reverb. But before you reach for your drill, stop. Prep is the secret sauce here. I can’t tell you how many times a customer has called me panicking because their panels won’t stick, or they measured wrong and wasted half their order.
First step: map out your sound problem. Grab a smartphone and use a free app—like Room EQ Wizard or even just the basic audio recorder on your phone. Clap once in the center of the room, and listen. If the echo lasts more than a second, that’s your clue you need more absorption, especially on the ceiling. Next, measure the room. Length, width, height—write those down. Pro tip: don’t just measure at one point, check a few spots along the walls, because old houses have uneven ceilings and you don’t want panels that don’t line up. Also, take note of what your ceiling is made of—drywall, popcorn, concrete, drop ceiling tiles? That’s gonna change exactly how you hang the panels, so this is non-negotiable.
Oh, and pick the right panels first. Don’t just grab the cheapest ones off the shelf. For ceilings, you want panels that are at least 2 inches thick—any thinner and they won’t absorb low-mid frequencies, which is the biggest culprit for that boomy echo. We sell a bunch of different types: fabric-wrapped fiberglass is the most popular because it’s affordable and works great, but we also have eco-friendly options made from recycled cotton if you’re worried about off-gassing. Just don’t make the mistake of ordering the wrong size. Calculate how much total square footage you need: a general rule of thumb is 15-25% of the ceiling’s total area. So if your room is 10×12, that’s 120 square feet, so shoot for 18-30 sq ft of panels. That’s enough to make a real difference without overdoing it.
Now, the actual installation. Let’s start with the least permanent option, because a lot of people don’t want to drill holes in their ceiling—rental folks, anyone with a drop ceiling, people who just want to test it out before committing. If you have a drop ceiling, this is a no-brainer. Most drop ceiling tiles are 2×4 or 2×2, so you can just drop acoustic panels right into the existing grid. Easy peasy, no tools needed. Just make sure your panels are the same size as your old tiles, and they’ll fit right in. I’ve had customers swap out a few bad tiles for acoustic ones in 10 minutes flat, and their sound improved immediately.
If you have a regular drywall or popcorn ceiling, you’ve got two main routes: adhesive or mounting hardware. Let’s talk adhesive first, because it’s the most straightforward for DIYers. But here’s the thing—regular white glue ain’t gonna cut it. You need something heavy-duty, made specifically for hanging on ceilings. We recommend industrial-strength construction adhesive or, for lighter panels, heavy-duty mounting tape (the kind that holds like 50 lbs per strip). Step by step here: first, clean the ceiling where you’re putting the panels. Wipe it down with a little rubbing alcohol to get rid of dust, grease, or cobwebs—adhesive won’t stick to a dusty ceiling, I promise you. No one wants panels falling on their head mid-meeting or concert.
Next, lay out your panels. Don’t just start in the corner and go. For a standard room, center the largest panels first, and leave a 1-2 inch gap between panels for a clean look. Mark the spots with a pencil—you can use a level to make sure everything is straight. Once you’ve got your marks, apply the adhesive to the back of the panel in a zig-zag pattern, or put a few thick blobs in the corners and the middle. If you’re using mounting tape, apply 3-4 strips per panel, spaced evenly. Press the panel firmly to the ceiling, hold it for 30 seconds or so to make sure it sticks, and that’s it. Wait at least 24 hours before touching anything, though—adhesive needs time to cure.
But wait, what if your panels are heavier? Like, if you’re using thicker, custom-sized ones for a studio, adhesive might not be enough. That’s when you need mounting hardware, and this is the part where I see a lot of people mess up. First, you need to find the ceiling joists—if you drill into drywall only, the panel will eventually pull right out. Use a stud finder, and mark the joists every 16 inches or so (that’s standard for most homes). You’ll need screws, wall anchors if you’re not hitting a joist, and either furring strips (thin pieces of wood) or dedicated acoustic panel mounting brackets.
Here’s how that goes: First, cut your furring strips to the length of your ceiling panels. Then, screw the furring strips to the ceiling, aligning them with the joists. If a panel spans multiple joists, make sure there’s a furring strip every 12 inches to support it. Once the furring strips are up, you can either screw the panels directly to them (pre-drill small holes in the back of the panel so you don’t crack the fabric) or use panel clips to attach them, which lets you remove them later if you need to. If you don’t want to drill into your ceiling at all, we also sell tension rods that work like a curtain rod—you attach the rods between opposite walls, and hang the panels from the rods with hooks. That’s perfect for temporary setups, like a pop-up studio or a event space.
Now, a few pro tips that I’ve picked up over the years that no one tells you in the generic guides. First, stagger your panels, don’t line them up in a grid straight down the room. Sound bounces in waves, so a staggered pattern breaks up those waves way better than a straight line. Second, don’t cover every inch of the ceiling. Leaving a little space between panels actually improves sound absorption, because air gaps help the panel work better than if it’s pressed flat against the ceiling. Third, if you have a popcorn ceiling, skip the adhesive method. Popcorn is textured and can flake off, so adhesive won’t grip properly. Go with furring strips and screws—you’ll have a way more secure hold.
Wait, and what if you’re renting? I get it, drilling holes is a no-go. We’ve had so many rental customers ask for solutions. The tension rod trick works, or you can use heavy-duty hook-and-loop strips (the kind with the sticky back) that you can pull off later without damaging the ceiling. Just make sure to test a small spot first on an inconspicuous part of the ceiling to make sure it doesn’t peel the paint.
Now, let’s talk about common mistakes I see all the time. Number one: buying too thin panels. I can’t stress this enough—1 inch panels might look cheap, but they barely do anything for mid and low frequencies, which is where you need the most help for ceiling sound. Number two: not prepping the ceiling. I’ve had a customer order panels, clean the ceiling with a dry rag, and then wonder why the whole row fell off a week later. Dust is the enemy here. Number three: not measuring correctly. Don’t just go by the room’s square footage—if you have ductwork or light fixtures on the ceiling, you need to account for those. Panels have to go around those, or pick smaller panels to fit. Number four: spacing them wrong. Putting panels too close to walls or too far apart means you’re not getting the maximum absorption. Stick to that 15-25% rule, and leave 1-2 inches between panels.
Once you’ve got everything up, take a second test! Clap in the center of the room again. If the echo is gone or way shorter, you did it. If it’s still there, you might need a couple more panels, or move some around to better spots. Sometimes the hardest part is figuring out exactly where the sound is bouncing the most, so don’t be afraid to rearrange once before you get it right.

Look, I know installing acoustic panels can feel intimidating at first, especially if you’re new to this. But it’s totally doable, even if you’re not a handyman. The best part is that you’re not just making your room sound better—you’re investing in something that makes every conversation, song, or work call way clearer. If you’re not sure what kind of panels you need, or you have questions about hanging them for your specific ceiling type, don’t overthink it. Reach out, and we can walk through every step together. No sales pressure, just real advice from someone who’s been in this space for years, helped hundreds of folks get their sound right. We’ve got all the tools, adhesive, panels, and even free setup guides to make this as easy as possible for you.
PVC Ceiling Panel References:
- Acoustical Society of America. (2020). Room Acoustics for Non-Specialists. Journal of the Acoustical Society of America.
- Noise Control Foundation. (2021). Guide to Acoustic Panel Installation for Residential and Commercial Spaces.
- Miller, R. (2019). DIY Acoustic Treatment: A Step-by-Step Handbook for Home Studios and Offices. Sound On Sound Publications.
Hangzhou Eastopo New Marterial Technology Co., Ltd.
As one of the most professional acoustic panel manufacturers and suppliers in China, we offer a wide range of products with superior quality. Please rest assured to wholesale custom made acoustic panel from our factory. Good service and reasonable price are available.
Address: Room 304-20, Block B, Building 1,2,3&4, Kaixuan Jinniu Fang, Shangcheng District, Hangzhou, Zhejiang, China.
E-mail: mj@eastopo.com
WebSite: https://www.eastopo.com/
